This guide will show step-by-step instructions for setting up email account in Mail on OS X.
Adding a New Account
- Choose Preferences, from the Mail menu.

- Select Preferences.
- Click on the Accounts tab.
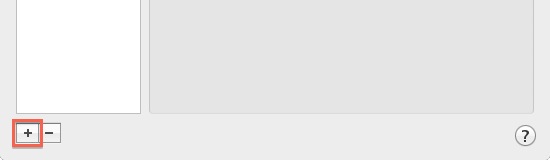
- On the Accounts window, click the + (plus) sign.
Account Settings
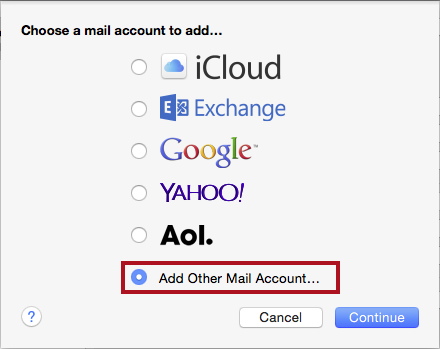
- Choose Add Other Mail Account
Enter your Full Name, or as you would like it to appear on your sent email.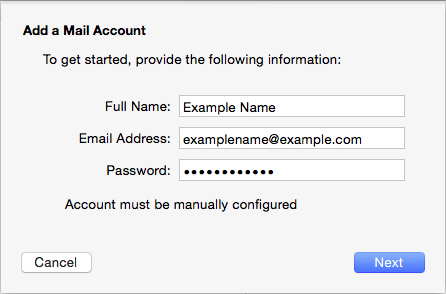
- Replace example.com with your own domain name.
- Enter your Email Address.
- Enter your email account's Password.
- Click the Continue button.
- A message should appear saying "Account must be manually configured". Click Next.
Incoming Mail Server
When entering the information for your Incoming Mail Server you will need to decide if you would like to use POP3 or IMAP. POP3 will download and remove all of the emails from our server, whereas IMAP will synchronize the emails between your email client(s) and our server.
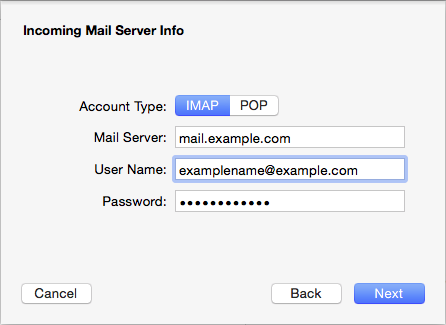
- Choose your account type. You may select either POP or IMAP.
Click here for an explanation on the differences between POP3 and IMAP
- Enter pop.example.com as the Incoming mail server. (replace example.com with your own domain name.)
- Enter your full email address as the User Name.
- Enter the Password of your email account.
- Click Next.
Incoming Mail Server Info
- For Path Prefix, please enter INBOX.
- If you are using IMAP, make sure you are using either port 143 with no SSL
- If you are using POP3, make sure you are using either port 110 with no SSL
- Authentication should be set to Password.
Outgoing Mail Server
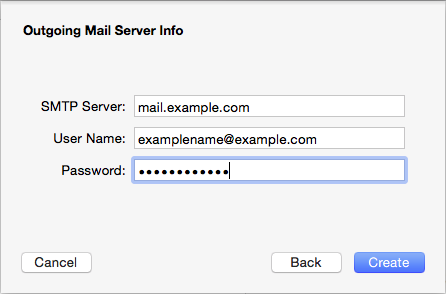
Replace example.comwith your own domain name.
- The Outgoing Mail Server is smtp.example.com (replace the example.com with your own domain name)
- Enter your full email address as the User Name.
Note: Outgoing username and password could say "optional" in the field. Please be sure to add your username and password to it.
- Enter the Password of your email account.
- You may receive a message saying Additional account information required.
- For the port number, you can use port 590.
- Make sure the Authentication is set to Password.
- Click the Create button.


