
This guide will show step-by-step instructions for setting up E-mail on Outlook 2010 for Windows. While it can be used for other versions of Outlook, some screens and steps might vary.
Adding a new account:
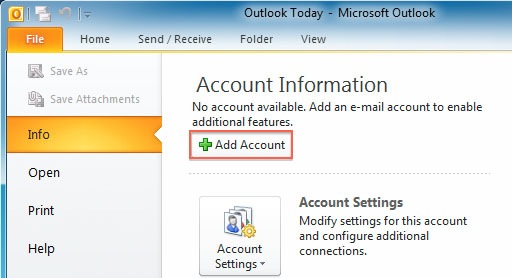
- Select the 'File' menu
- Select Info
- Click the Add Account button
- Choose Manually configure server settings

- Click Next
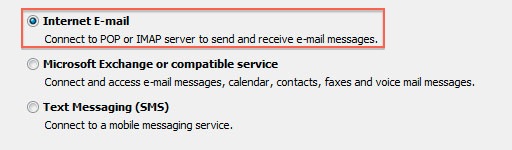
- Choose Internet E-Mail
- Click Next
Account Settings
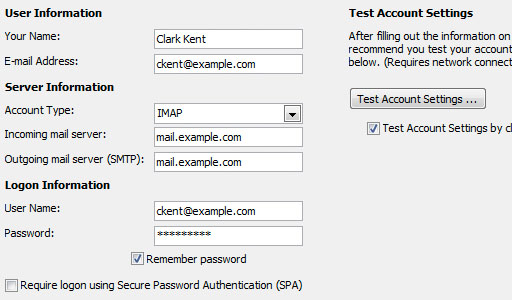
- Enter your Name as you want it to appear on your outbound email messages.
- Enter your email address.
- Enter mail.yourdomain.co.za as your Incoming Mail Server.
You would not enter yourdomain.co.za but your own domain name.
- The Outgoing Mail Server is mail.yourdomain.co.za.
- Enter your email address for the User Name.
- Enter your email password.
More Settings
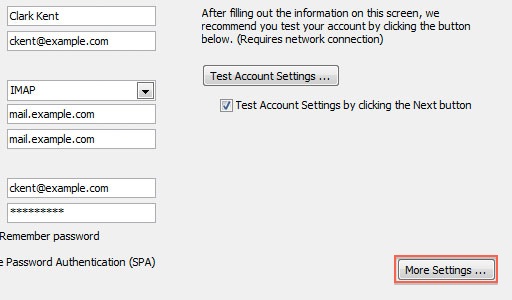
- Click the More Settings button
- Click the Outgoing Server tab
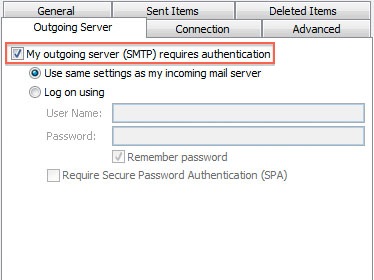
- Check the "My outgoing server (SMTP) requires authentication" checkbox
- Check "use the same settings as your incoming mail server"
- Click the Advanced tab
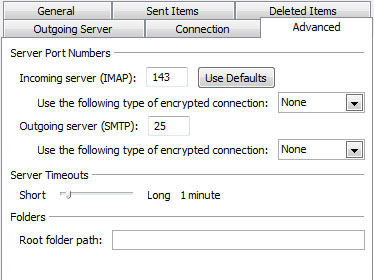
- If you are using POP3 with SSL, click the checkbox and enter 995 as your port. Otherwise leave the default port at 110
- If you are using POP3, with phones and tabs, you may choose when messages are removed from the server (Please set this to around 7 days, NOTE - mailboxes are 500Mb and when full, mails stop being received until the mailbox is cleaned out.)
- If you are using IMAP with SSL, click the checkbox and enter 993 as your port. Otherwise leave the default port at 143
- If you are using SMTP change the non-default port to 587(STARTTLS)/465(SS/TLS)
- Click the OK button
Testing Settings
- While on the E-mail Accounts screen, click the Test Account Settings button
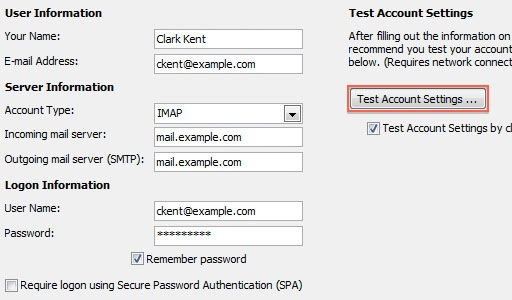
- This will both check your settings and send a test email to yourself to confirm that everything is working. If you receive any errors, please check your configuration
- Click the Close button on the Test Account Settings window
- Click Next on the E-mail Accounts window
- Click the Finish button
Outlook 2010 is now correctly configured to send and receive emails